STUDIO USER GUIDE
Studio user guideFrom your first copy to a finished video
Choose a creative task, start with product details and turn your plan into assets you can review and download. This illustrated guide explains the workspace, production steps and common settings. If you only need copy or images, stop at the result that fits your task.
NEXT U · Screens and content updated
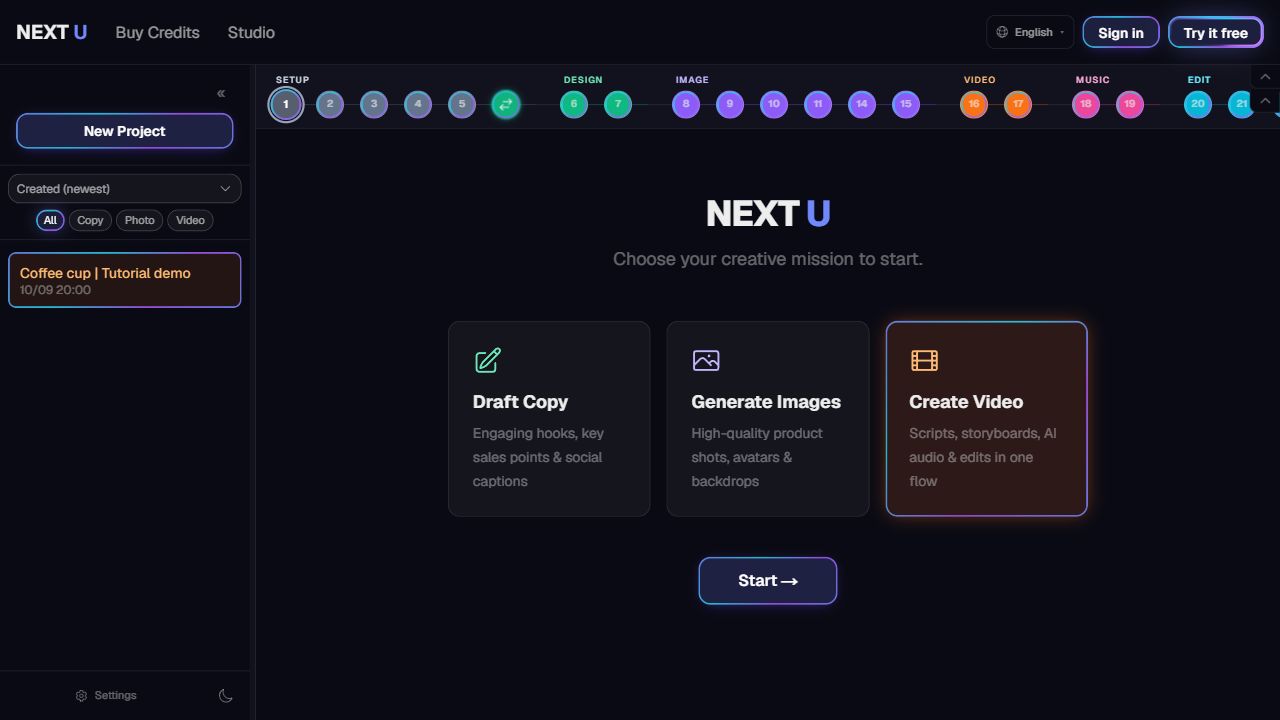
Screens show the current English Studio interface with demonstration details and existing public AI assets. They are not customer projects, original generation records, endorsements or paid generations from this tutorial. Options vary by mode, engine and account state.
Choose a route for your task
Step 1–6
Write copy
Product details → presenter choice → marketing concept → plan and copy. Start with headlines, selling points and an ad direction.
Step 1–15
Create images
Product details → workflow → plan → product/person/scene references → ad images. Unneeded asset stages are skipped.
Step 1–22
Make video
Product details → workflow → script and storyboard → clips → music → captions and editing → finished video.
Not every project uses every stage. Copy, images, people, outfits, environments, storyboard frames and music appear or are skipped according to the mode and settings. The guide includes both the main route and optional branches.
Projects on the left, production steps at the top
Create, filter and organize projects
Use the sidebar to create projects, filter copy/images/video and sort, pin or rename your work. Check that generation has stopped before switching.
Return to a completed stage
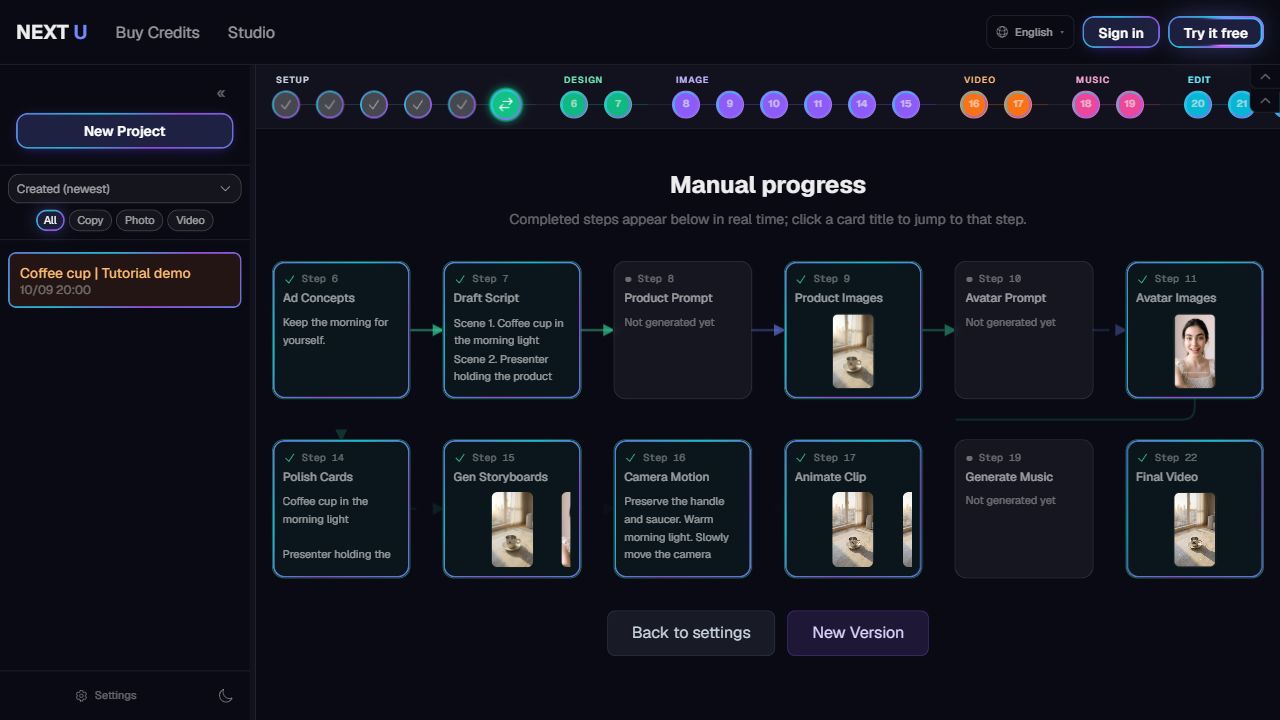
The step bar shows progress. Once prerequisites are complete, use a node to return and review. Manual progress cards also open the matching stage. After an upstream change, check which downstream assets need a redo.
Arrange your workspace
Resize or collapse the sidebar, step bar and title bar. The lower-left control switches Studio between dark and light display. Mobile has its own navigation layout.
Save, resume and delete
Reopen the original project with the same account and check save and generation status before leaving. Project deletion is permanent: download needed results and assets first. An asset download does not back up all project settings.
01 | Prepare product and presenter details
Start with accurate information. URL extraction helps, but you still check product facts and rights to the assets.
Step 1
Choose copy, images or video
Open Studio, choose Write Copy, Create Images or Make Video, then select Start Creating. Starting creates your first project; the sidebar also lets you create a new one.
What to check:Choose the deliverable first. Copy ends at planning; images and video continue through their own production steps.
Step 2
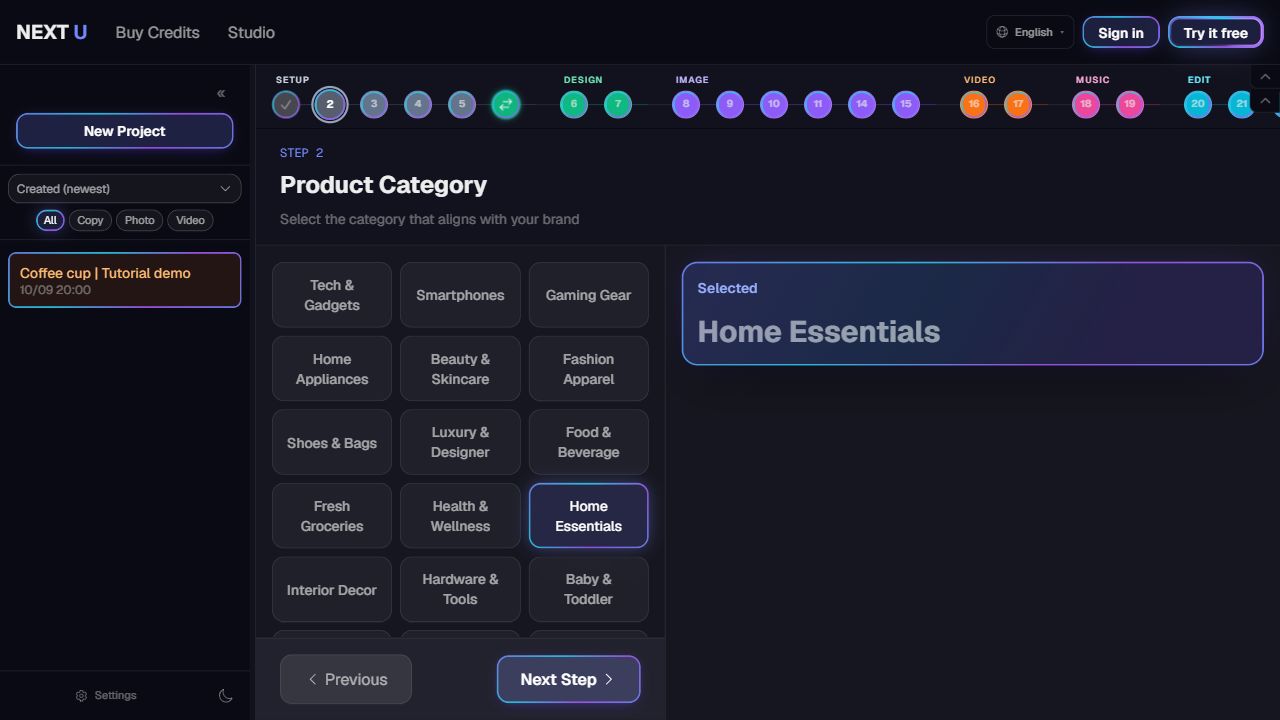
Choose a product category
Pick the category closest to your product to give marketing concepts and visual choices a relevant starting point.
What to check:A category is not a product specification. Supply accurate details in the next step.
Step 3
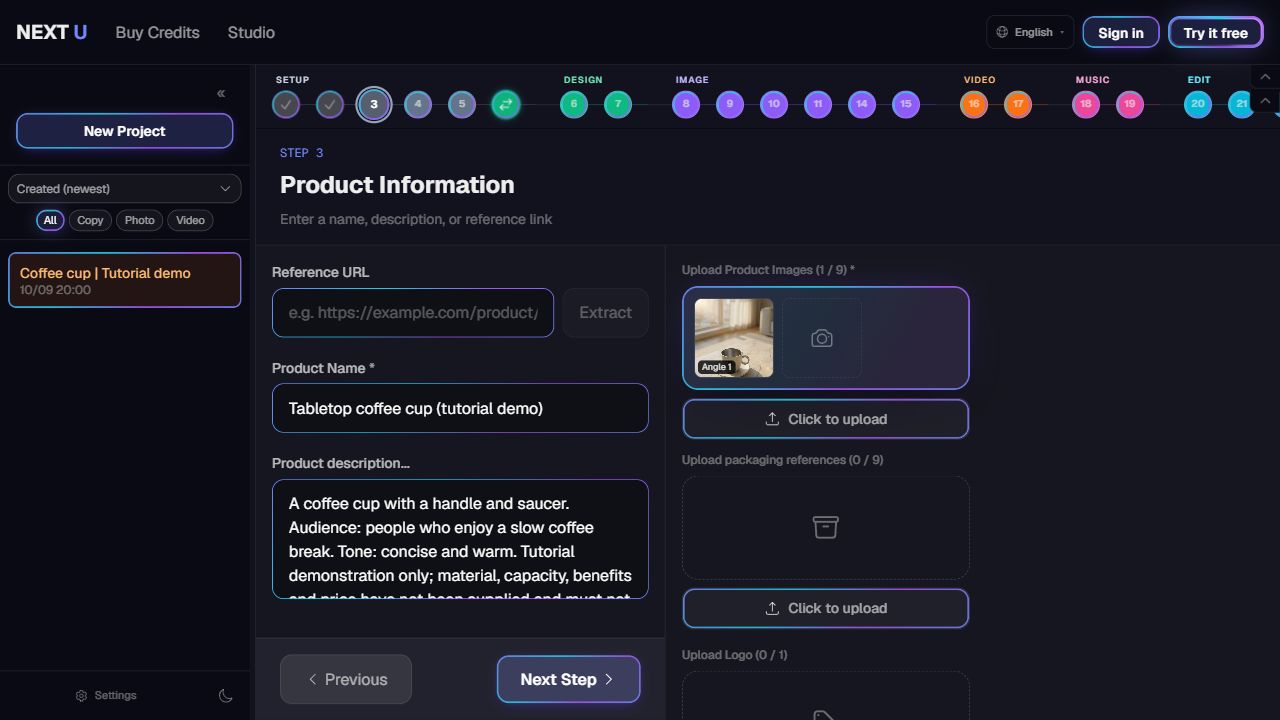
Add product details and references
Enter the product name, description and audience. Paste a product URL and extract its information, or fill it in yourself. Add clear product photos, optional packaging and a logo: up to 9 product photos, 9 packaging photos and 1 logo.
What to check:If extraction fails, enter the details manually. Use authorized photos and do not invent capacity, price or performance. Image and video projects need product references.
Step 4
Decide whether to use a person
Choose a presenter when your ad needs one, then continue to character details. For a product-only ad, choose no presenter.
What to check:People are optional. Person and outfit steps are skipped where the settings do not call for them.
Step 5
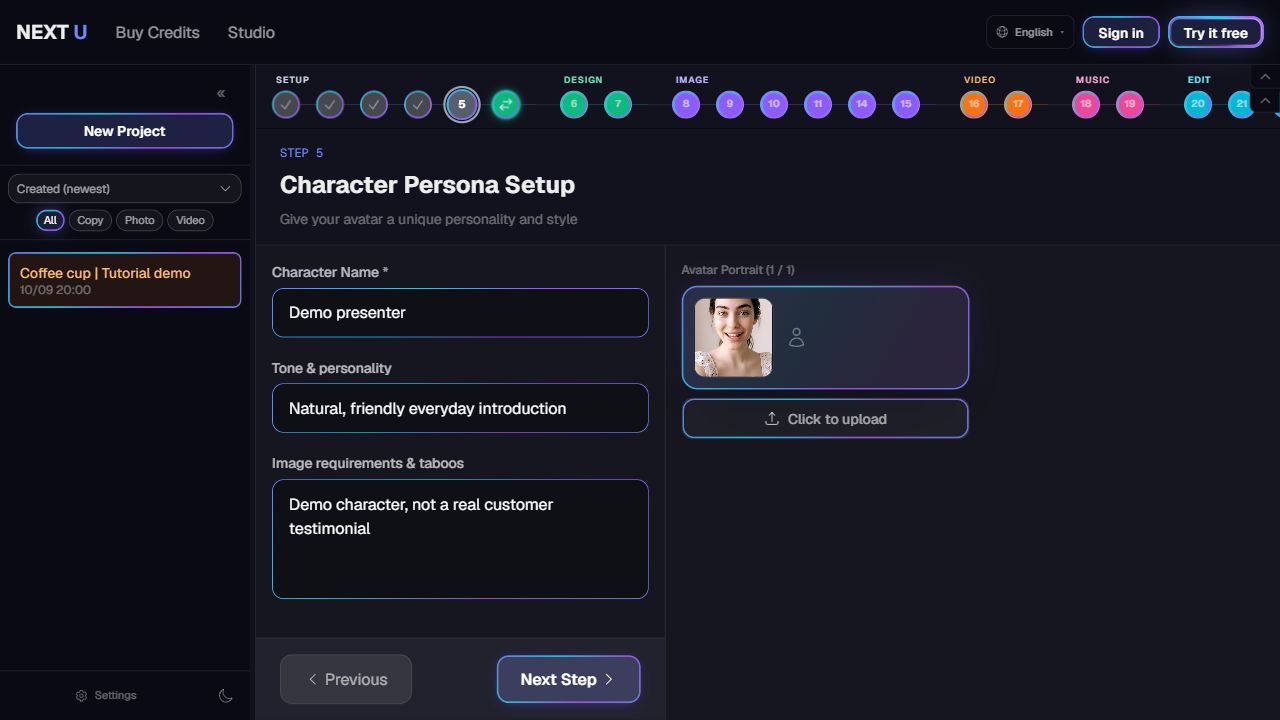
Describe your presenter
Add a name, appearance or style and notes. Include an authorized reference photo when available and describe the traits that should stay consistent.
What to check:A demonstration character is not a customer testimonial. Confirm rights to photos and likenesses.
02 | Review each stage or choose automatic production
Manual mode supports stage-by-stage review. In automatic mode, confirm settings and usage first and review the results afterward.
Step 5.5
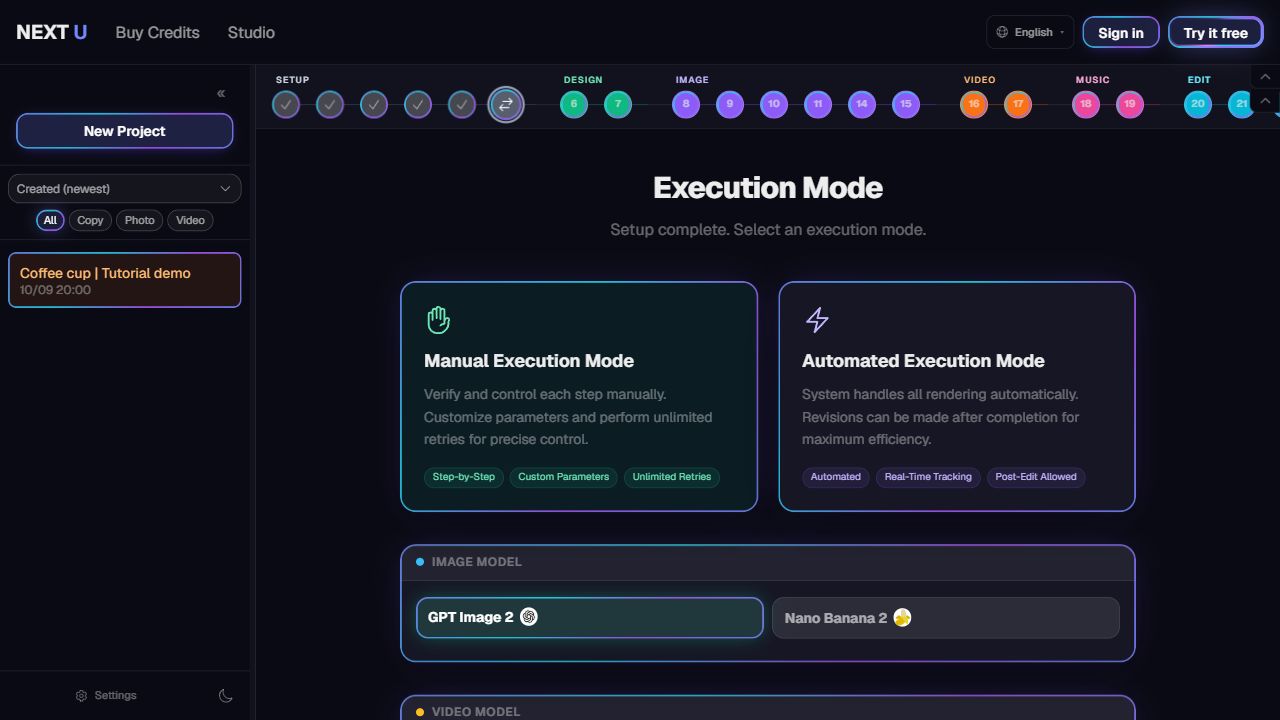
Choose manual or automatic production
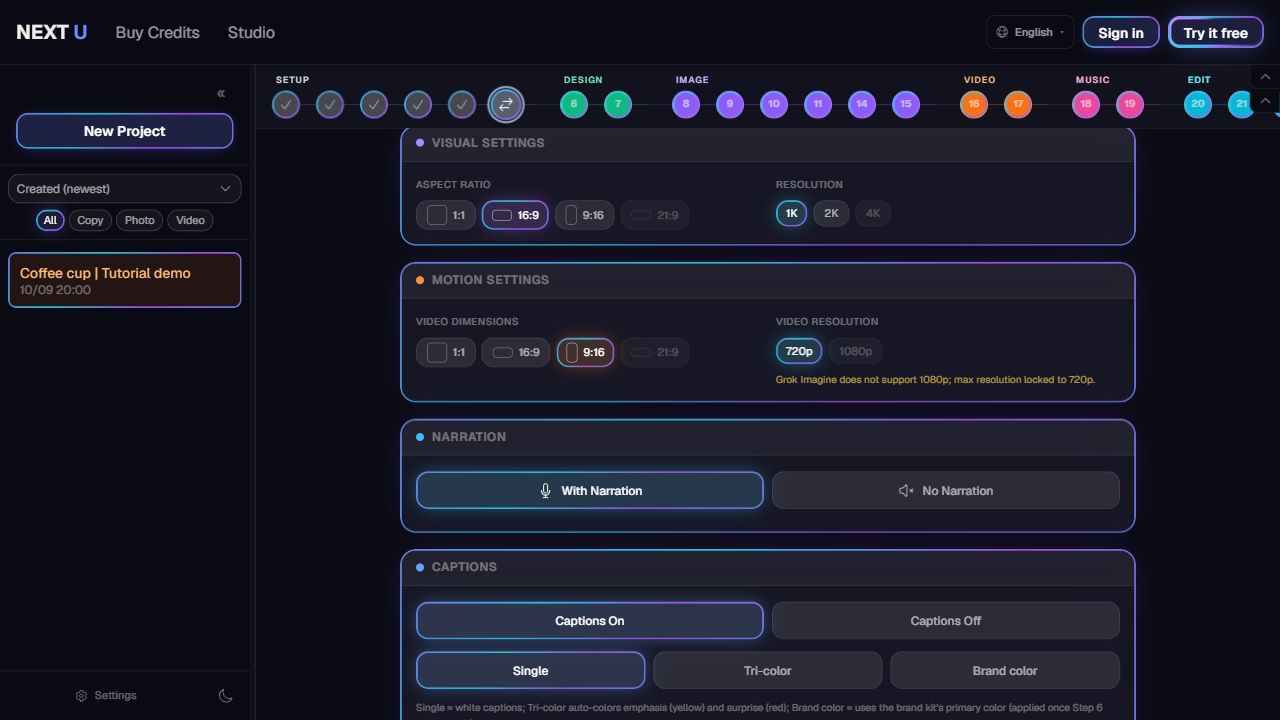
Manual mode lets you review each stage. Automatic mode starts with the available image/video engines, aspect ratios, quality, duration, narration, captions, music and logo options. Check the estimated usage before starting.
What to check:Disabled options are unavailable for the current settings. Use the progress panel to pause, continue or redo; redo can add usage and is not unlimited free generation.
03 | Turn a marketing concept into copy and a script
Review the text direction before an inaccurate claim reaches every image or scene.
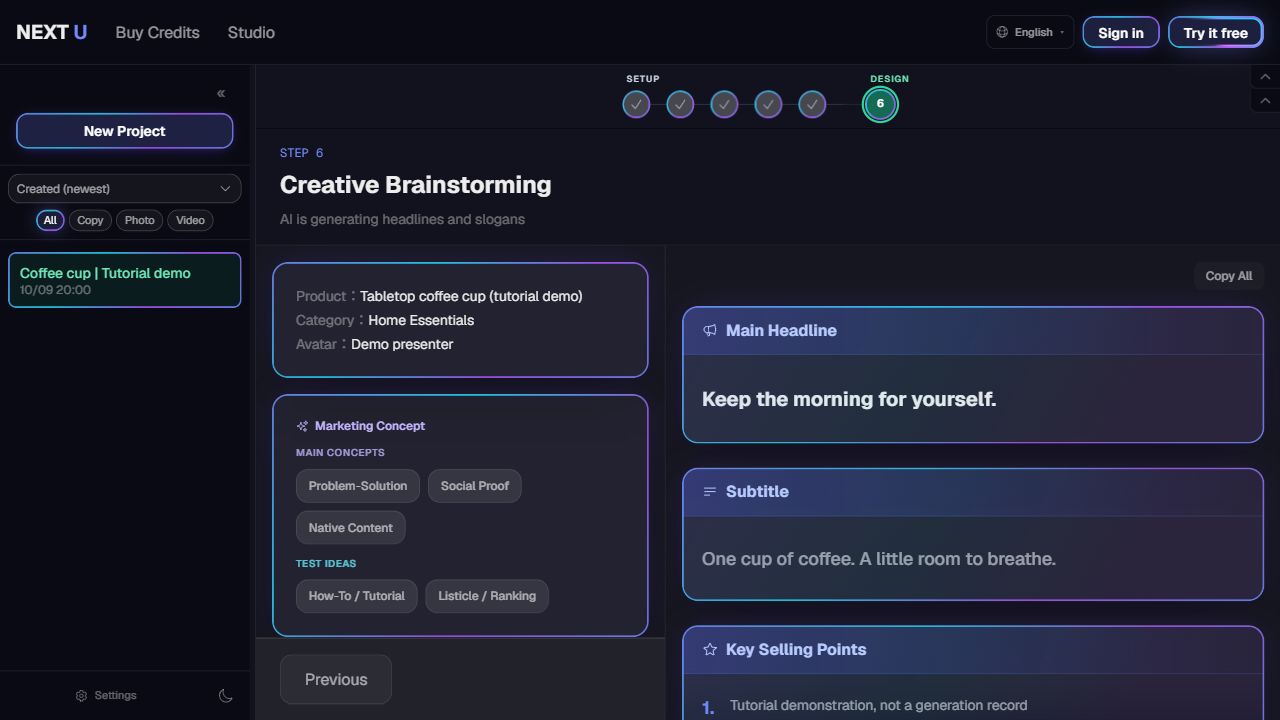
Step 6
Create the ad plan and copy
Check the product and presenter summary, choose a marketing concept and, for images, a visual style. Generate a proposal, review the headline and direction, return to a draft or copy the text. A brand kit created with the proposal carries into later stages.
What to check:Review brand voice, colors and claims to avoid. This is the main results page for copy-only projects.
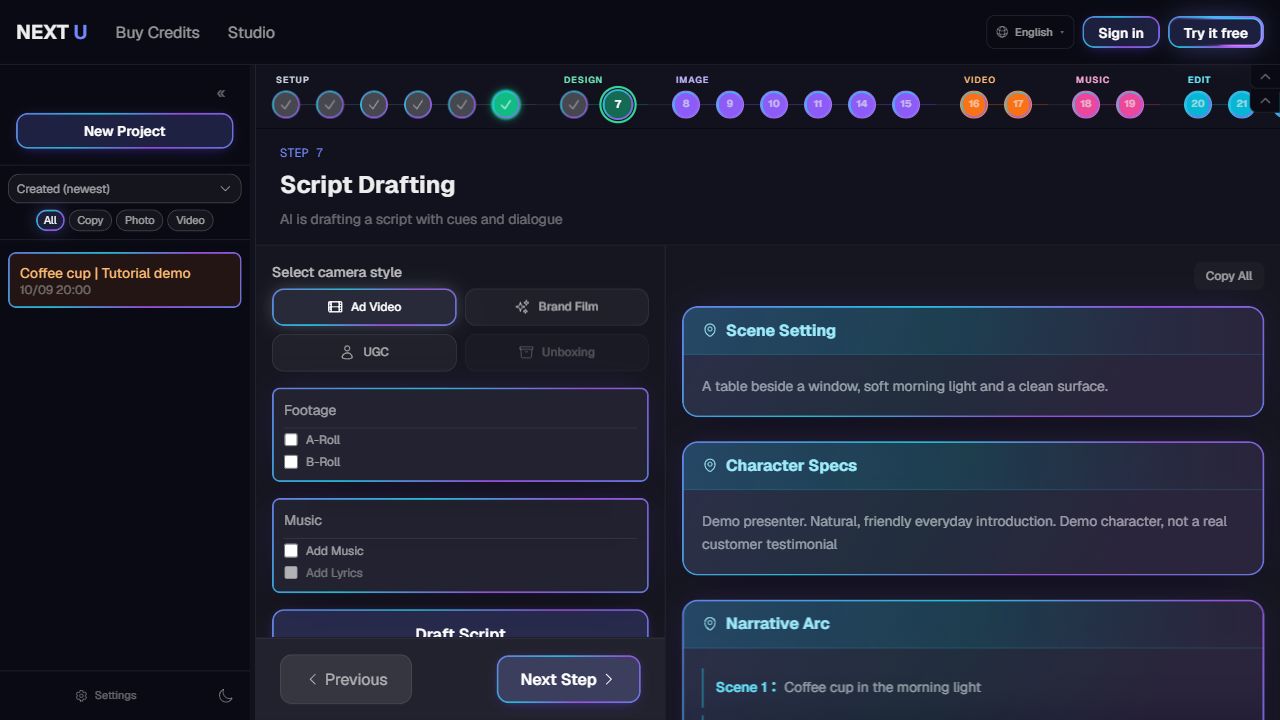
Step 7
Write the video script
Choose an available ad, brand film, UGC or unboxing direction. Select main/supporting footage, music, lyrics and use of an uploaded logo as needed, then write the script.
What to check:Review each scene, character, line and camera move. Image mode skips video scripting; available directions depend on presenter and engine settings.
04 | Build product, presenter and environment images
Prepare instructions before generation and carry consistent references forward. Inspect full-size images rather than thumbnails alone.
Step 8
Prepare product-image instructions
Turn the plan into product-image instructions and review the background, angle and presentation before generating.
What to check:Use clear references for shape, labels and packaging. Instructions are not finished images.
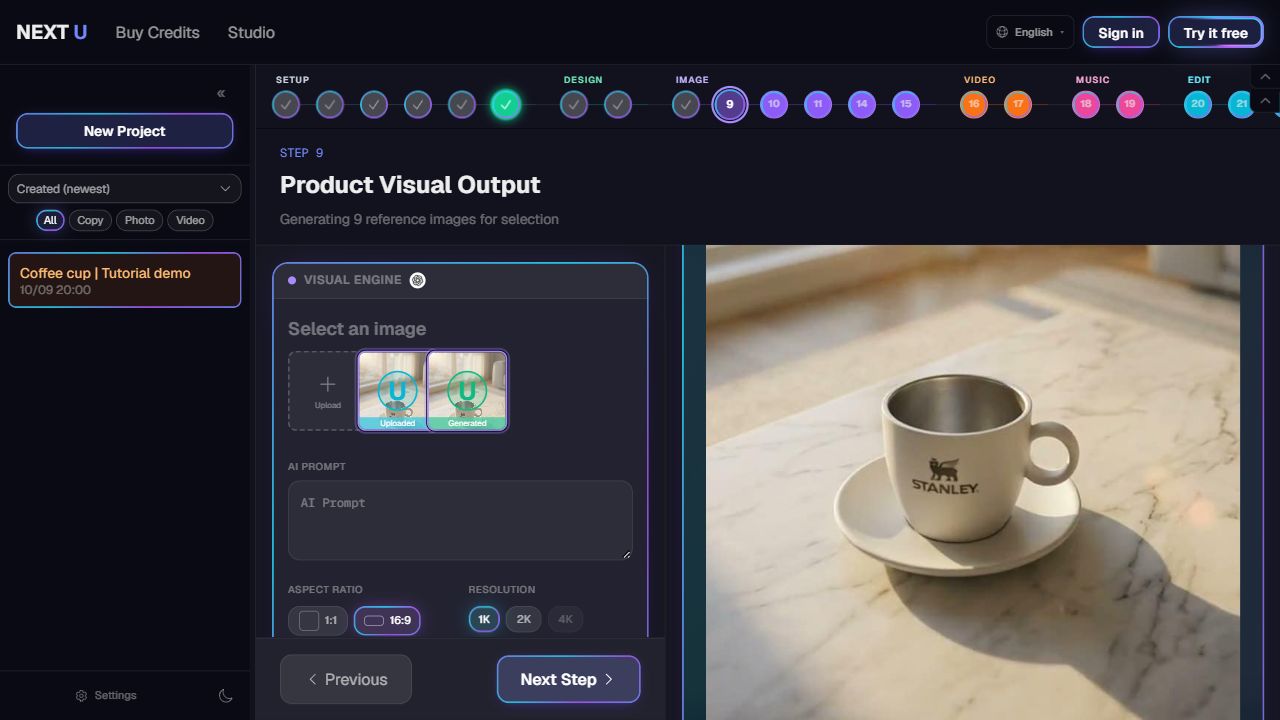
Step 9
Create and choose product images
Check the instructions, aspect ratio and quality, create product images, then choose the version to use in later stages.
What to check:Inspect handles, edges, labels and text at full size. Check additional usage before a redo.
Step 10
Prepare presenter-image instructions
Turn the character details into appearance, expression and background instructions and refine them using the reference photo.
What to check:Confirm suitability and rights. This stage may be hidden when no person is required.
Step 11
Create and select presenter photos
Create presenter photos, inspect faces, hands and expressions, then choose a version for the scenes. If reusable assets are offered, confirm the intended character.
What to check:Review consistency in every image. Do not present an AI character as a real endorser.
Step 11A
11A: Plan an outfit change
When a different outfit is needed, choose an outfit change and describe clothing, colors and style. Otherwise keep the original photo.
What to check:This is an optional branch and is hidden without a presenter or for unsupported video directions.
Step 11B
11B: Create the new outfit photo
Check the clothing instructions and presenter reference, then create and select an outfit version.
What to check:Make sure the face, clothing and product have not changed unintentionally.
Step 12
Prepare scene-image instructions
Describe the product environment, lighting and composition, translating the plan or script into scene-image instructions.
What to check:This stage appears only when separate scene assets are needed. A hidden stage does not mean a missing task.
Step 13
Create scene images
Create a background or environment and choose a version compatible with the product and presenter for storyboard references.
What to check:Inspect perspective, lighting, product scale and space for text.
Step 14
Refine storyboard cards
Turn the script or image styles into scene-by-scene image instructions and map the product, presenter, environment and logo references.
What to check:Image mode follows the selected styles. Some video engines use a direct video-reference workflow and skip this stage.
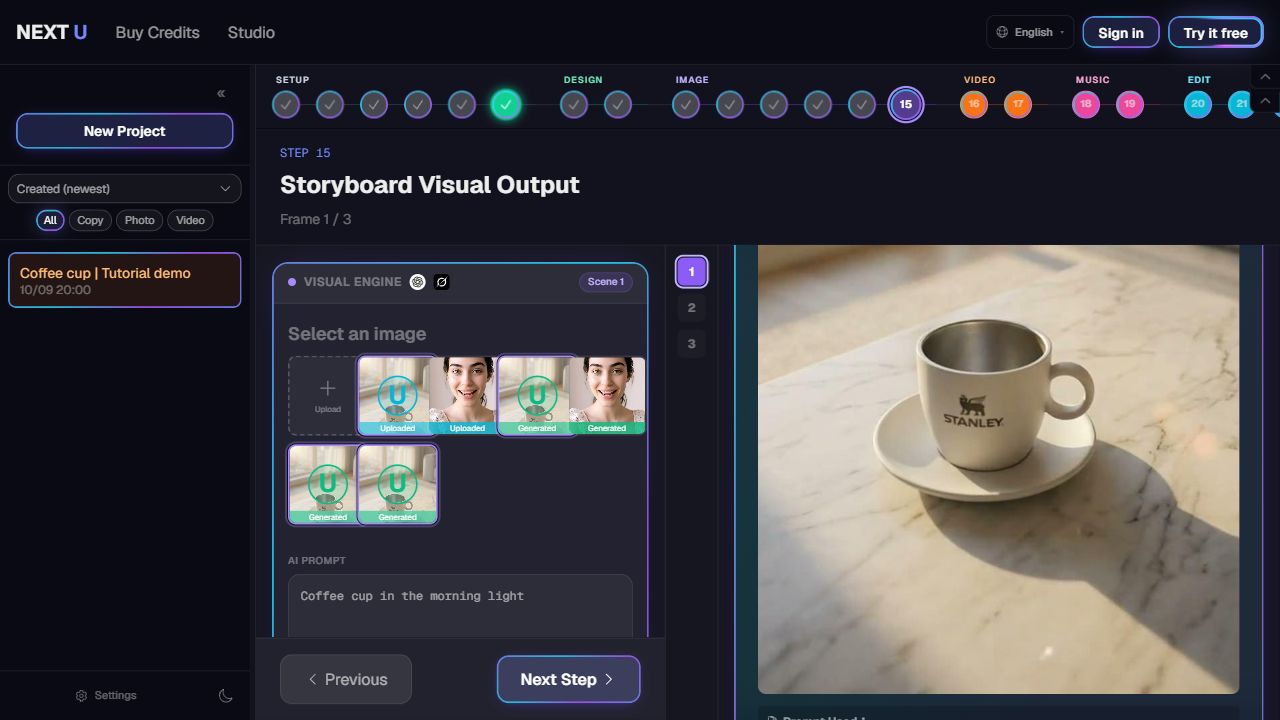
Step 15
Create storyboard frames
Choose references for each frame, generate it and select a version. Image projects can review and download the final ad images here.
What to check:Inspect complete products and faces before video production. Choose the intended aspect ratio.
05 | Bring the storyboard to life
Check actions, dialogue, aspect ratio and length before creating and reviewing each clip.
Step 16
Plan motion and camera moves
Prepare video instructions for each scene and review dialogue, sound effects, camera movement and reference assets.
What to check:Match the dialogue and movement to the scene duration. Avoid too many actions in a short shot.
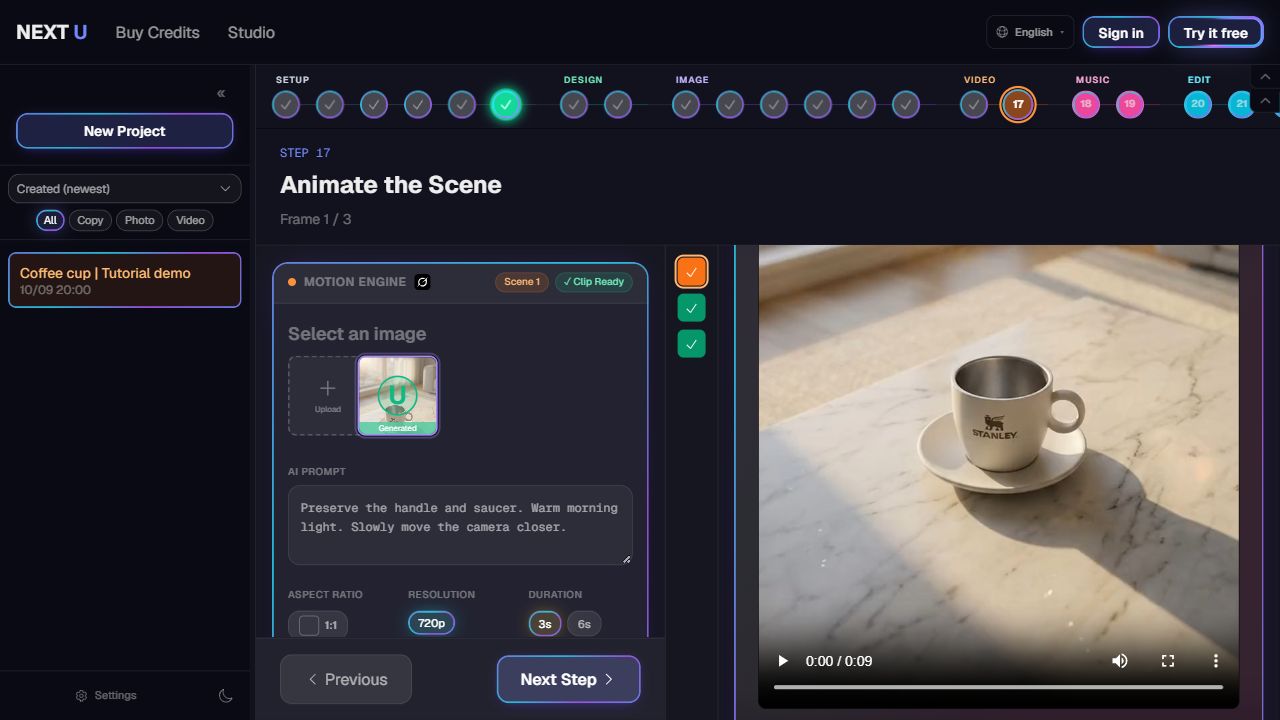
Step 17
Create and review video clips
Check each scene’s references, video settings and usage, then generate. Preview completed clips and inspect people, products, motion and lip sync before selecting an editing version.
What to check:Submission is not completion. Check success or errors and the cost of another attempt.
06 | Choose music, or leave it out
Music should support the visuals and speech. Choose instrumental music or lyrics before selecting a version.
Step 18
Decide whether to add music
Choose music when needed and prepare its direction from the script; otherwise continue to editing.
What to check:Keep speech understandable when using narration. Music cannot guarantee accurate video content.
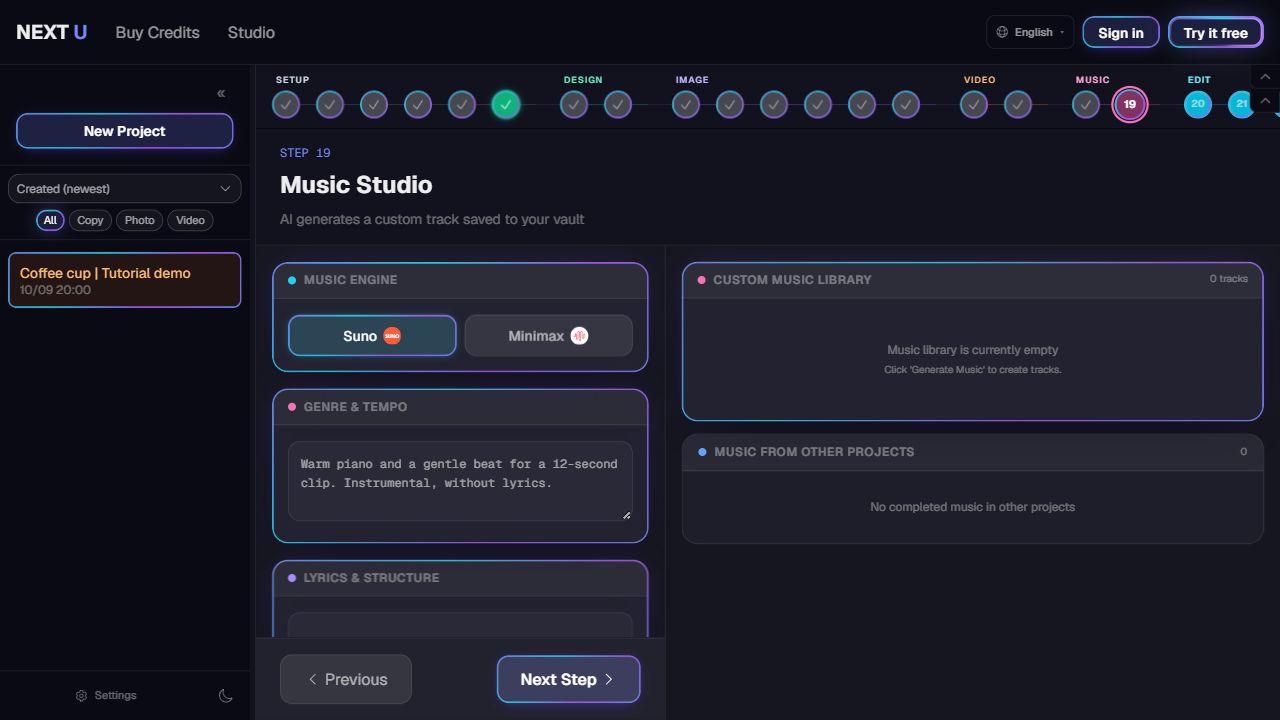
Step 19
Make music and manage the library
Review the music style and instructions, add a lyrics structure if needed, then create, listen to and select a library version. Keep it instrumental when lyrics are unnecessary.
What to check:Match rhythm, length and mood. Review usage before creating or regenerating music.
07 | Review pacing on the timeline and download
Review captions, people, products and sound together. Check the final video and keep the assets you need.
Step 20
Choose an editing method
Choose one-click automatic editing to use defaults, or quick editing to adjust the timeline yourself.
What to check:Review automatic results too. Use quick editing when captions or scene pacing need changes.
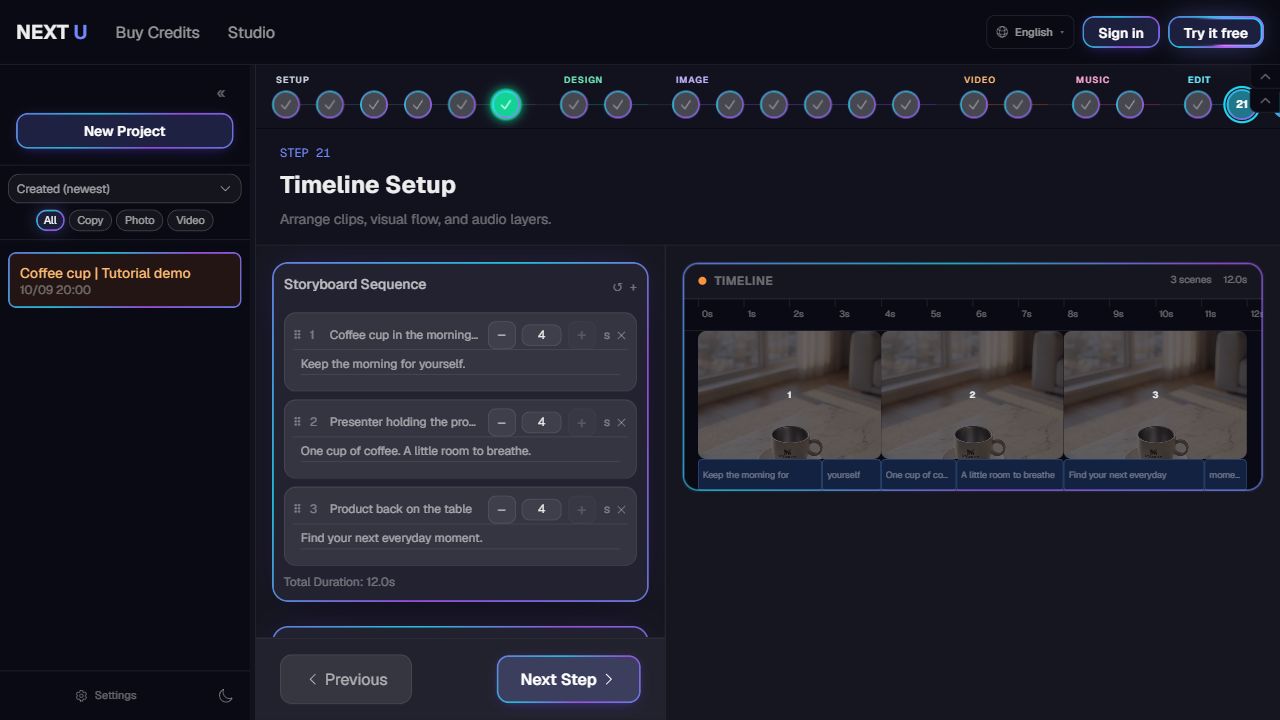
Step 21
Adjust timeline, captions and sound
Change scene order and length, add or remove clips and choose transitions. Choose the music start, highlight alignment and fades. Edit caption text, font, size, colors, position, outline, box and shadow, then preview a scene or the whole video.
What to check:Keep duration within the available footage. Leave safe space around faces, logos and products, including in vertical video.
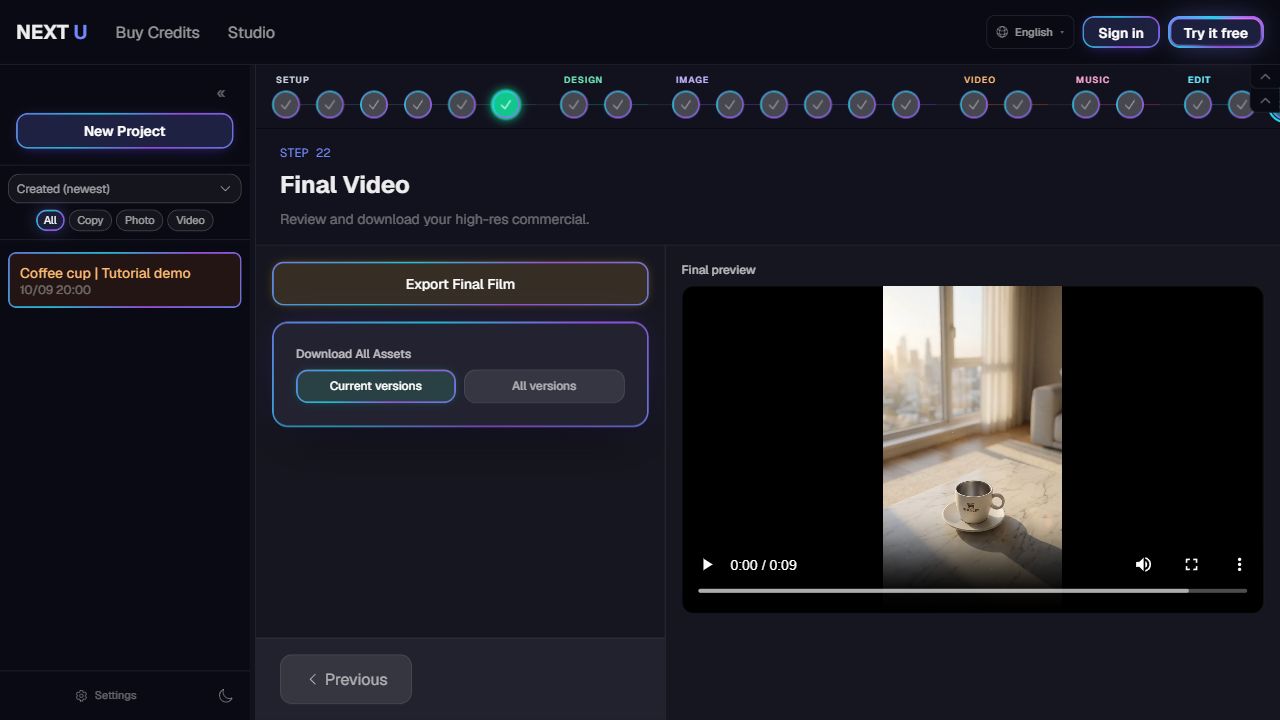
Step 22
Preview and download results and assets
Check the final video and processing status and download MP4 from the video library. Download the current versions or all versions to package production assets.
What to check:Wait for completion. Retrieve any files reported as failed during packaging. Reopen the project for expired links; an asset package is not a restorable project backup.
08 | Set up MCP, CLI and Skills
Settings in the lower left offers three integration routes. They operate the same workspace; you do not need to install all three. Availability is shown after sign-in. “Coming soon” means that connection or token feature is currently unavailable, not that you followed the steps incorrectly.
MCP: Continue a project through AI chat
Open Settings → MCP for the connection details and client instructions. Authorize NEXT U in a supported ChatGPT or Claude account/workspace and verify the project. Use a public product URL or upload in Studio first; chat attachments do not automatically enter the project.
MCP →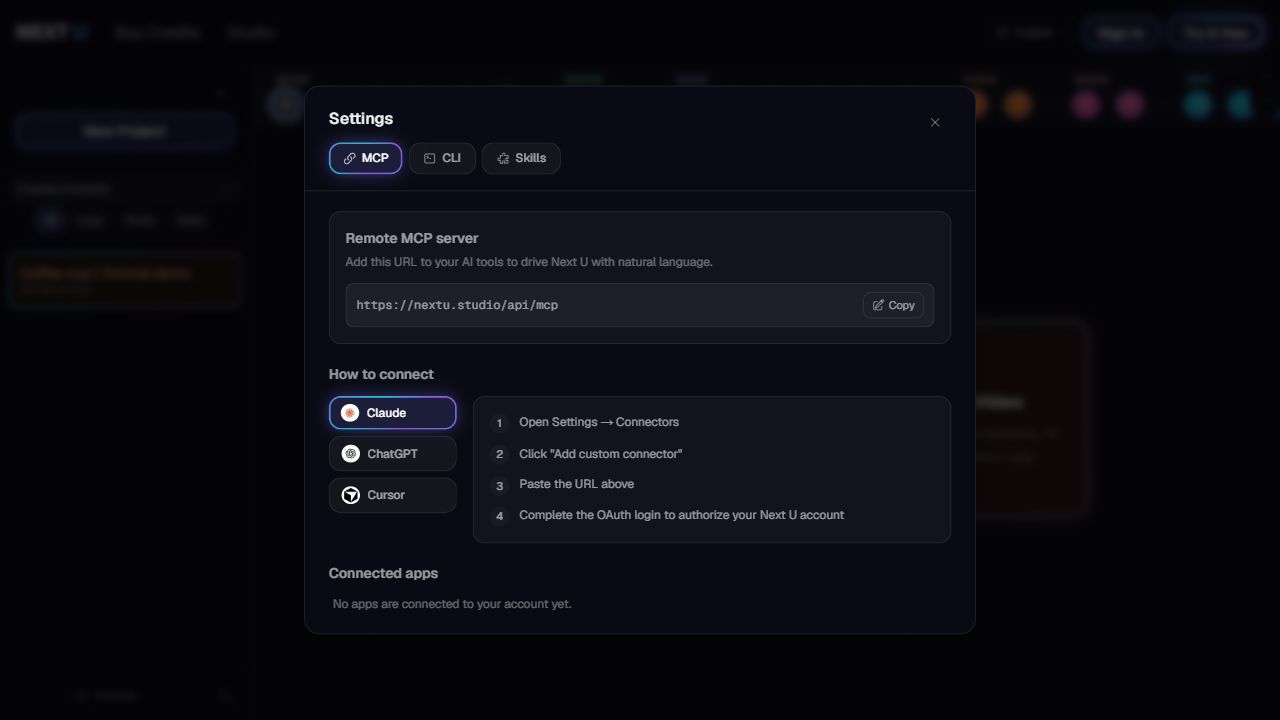
CLI: Work from a terminal
Settings → CLI provides installation and authentication instructions. A terminal and account authorization are required. Follow the current screen and keep tokens out of public chats and screenshots. CLI is optional; the website does not require it.
CLI →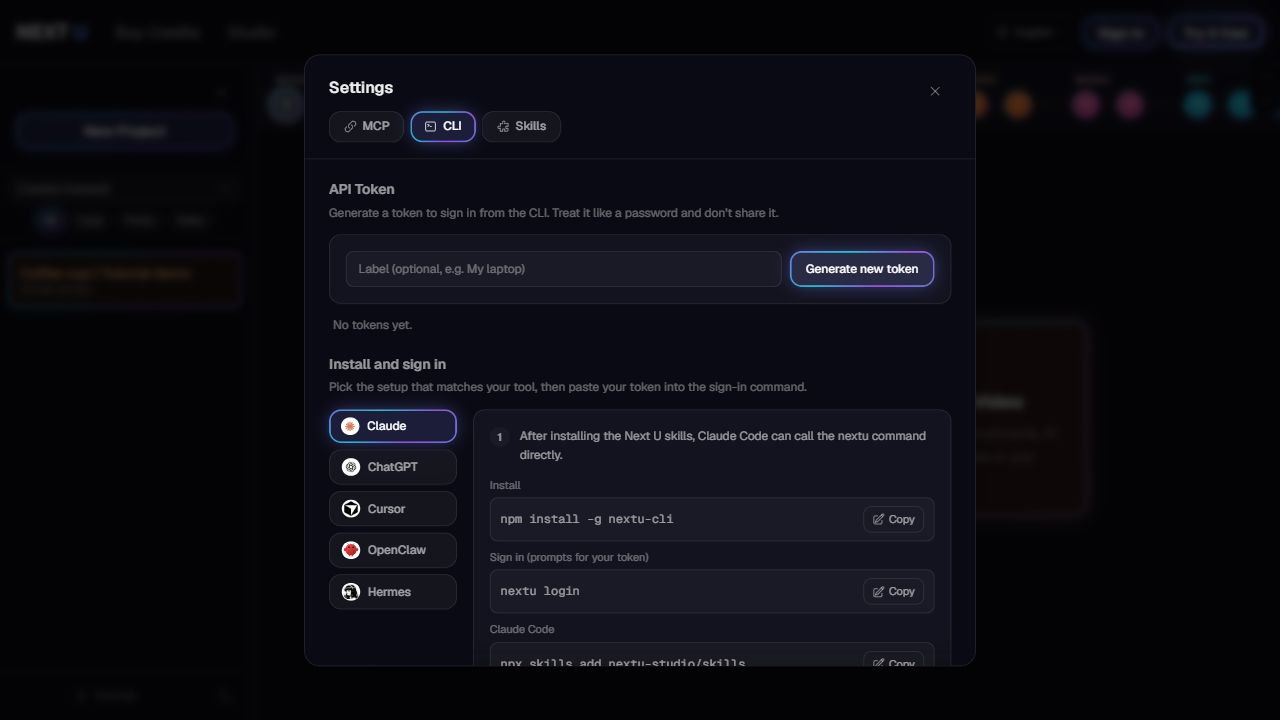
Skills: Download reusable instructions
Settings → Skills provides the existing package and usage instructions. Choose a Skill for your client. A Skill does not connect MCP, sign you in or provide free media generation.
SKILL →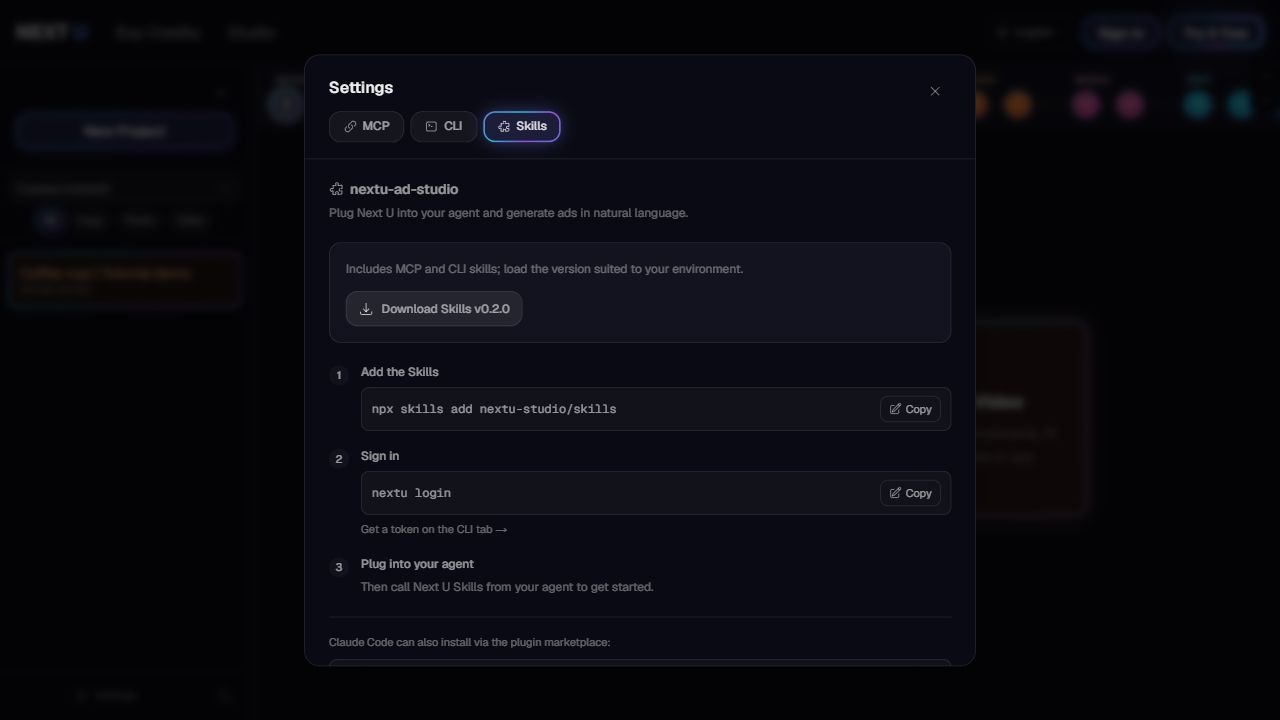
A final check before downloading
- Products, logos, packaging and people are complete, without distorted hands, misspellings or cropped faces.
- Dialogue, captions, music and pacing fit the task; review at the intended vertical or horizontal format.
- Processing is complete and the downloaded files open; retrieve any assets reported as failed during packaging.
- Confirm asset and likeness rights, product claims and platform requirements. Demonstrations do not guarantee ad performance.
Common Studio questions
Do I need to sign in?
This guide is public. Production Studio requires a NEXT U account. Generation and editing still depend on account state, balance and the usage of the requested task.
Why do I see fewer steps?
Steps depend on copy/image/video mode, presenter, outfit, environment, music and engine choices. Image mode skips a video script; no presenter skips person and outfit branches. Some video workflows also skip separate storyboard stages.
Can I change an automatic result?
Yes. Return to an applicable stage to review and adjust. Check the project and version first and review downstream assets that need regeneration and additional usage.
Does “unlimited remakes” mean free?
No. Review usage for each image, video or music remake. Credits are charged when generation starts and automatically refunded on failure. A credit’s unit value is not the price of a whole ad.
Does every engine support every ratio and quality?
No. Available aspect ratios, image quality, video resolution and duration depend on the selected engine and settings. Disabled options cannot be chosen. Set the intended format before creating assets.
Is an asset package a project backup?
Current-version or all-version downloads package available production assets and report failed files. They are not a backup that restores all project settings. Resume through the original project with the same account.
Know the interface? Start with your own product
Product photo to ad guide →
Prepare photos, descriptions and your first ad brief.
ChatGPT ad creation guide →
Connect, estimate and return to Studio to review results.
Claude ad creation guide →
Continue an ad project through chat and optional Skills.